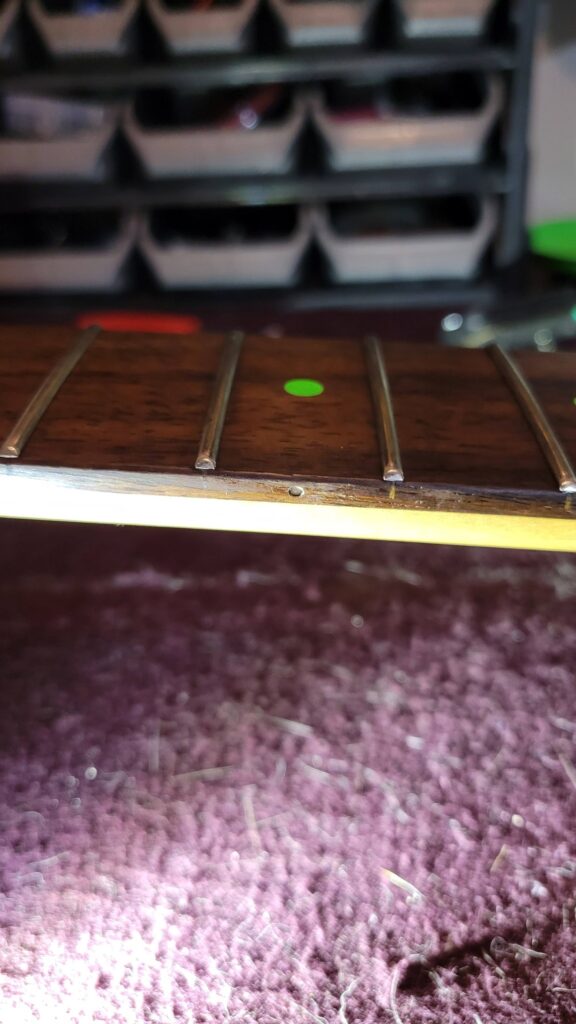
Side dots on a guitar might seem like a small detail, but they make a huge difference when it comes to visibility and playability. Over the years, there have been plenty of videos showing different side dot mods, usually involving decals, nail polish, or paint intended for crosshairs. Unfortunately, I haven’t had much success with any of those methods, especially the stickers. They work fine until you actually start playing, then they slide around and leave sticky residue all over the neck. I’ve also had poor results with luminescent side dot material on factory guitars. It doesn’t stay charged for long, and when it isn’t glowing, it’s actually harder to see than standard side dots.
The good news is that replacing your side dots is much easier than you might expect and can be done with just hand tools!
Disclaimer: The process described here is intended for dark fretboards; rosewood, ebony, jatoba, etc. If you’re doing this to maple or a roasted maple, the finishing process will be different and it would be best to refinish the whole neck.
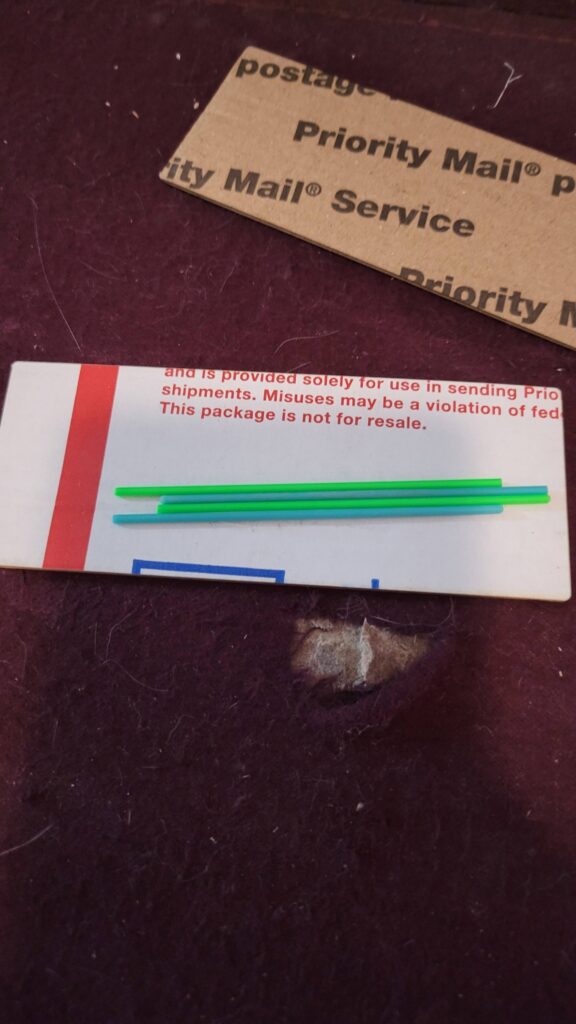
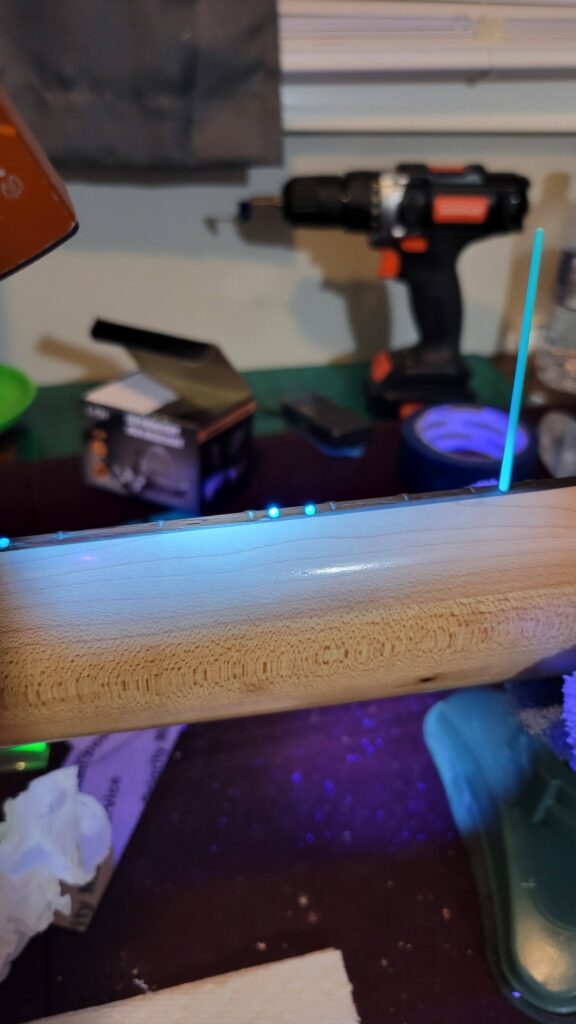
First, you’ll need to choose a material and determine the size of your existing side dots. You can go larger if you want, but that makes the process a bit trickier since you’ll have to widen the holes. Around 2 mm is the typical side dot diameter. I wasn’t too concerned about glow in the dark features, I mainly wanted a super bright color. These do glow as well, and even better than Luminlay, but that was just a bonus!
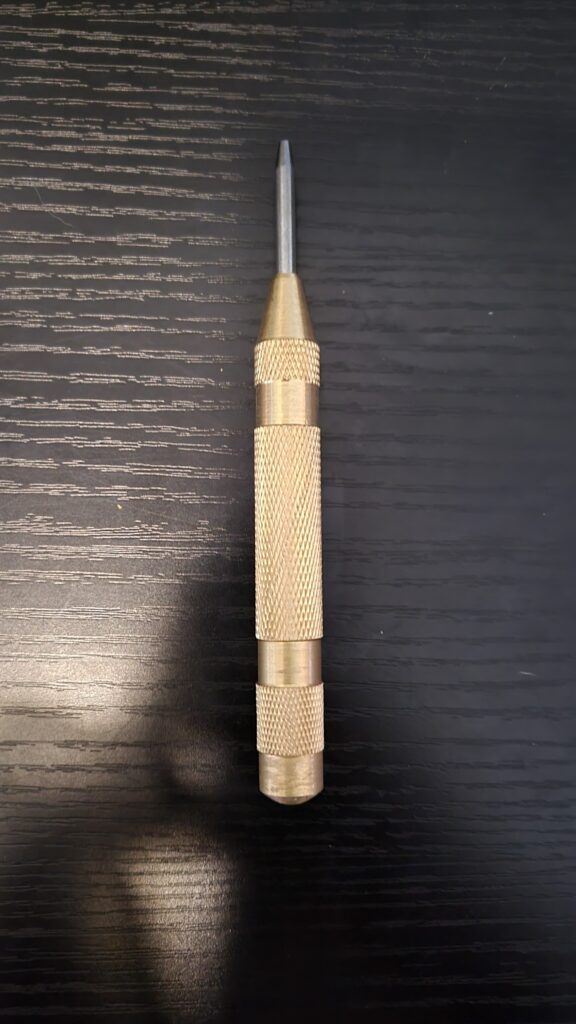
When it comes to tools, you’ll definitely want a spring loaded punch. You can grab one from Harbor Freight for about five bucks, and it makes the whole process much easier. Not only does it give you a solid center point for drilling, it will often push the existing side dots inward, which makes drilling them out even simpler.
You’ll also need a 2 mm drill bit, or whatever size matches your side dots, along with flush cutters, superglue, and a sanding block. A small vise or two and some cloths is helpful for keeping everything steady and protecting the neck from getting dinged up. For sanding, I use a four sided sanding block that I normally use for fret leveling. It has 400, 600, 1000, and 1200 grit, and I ended up using all of them.
You could probably do this without removing the neck, but I highly recommend that you do. With the neck off and secured, the whole process is much simpler. Once it’s removed, start by using the punch on each of your side dots. Next, figure out how deep you need to drill. It won’t be much, maybe around 2 mm at most, but likely around 1.5 mm. The goal is to make sure none of the old inlay is visible around the edges and that the new material sits deep enough in the hole to stay put while the superglue dries before you cut it to do the next.
I like to wrap a piece of masking tape around the drill bit to mark the depth so I don’t go too far.
Once the holes are drilled, it’s time to install the new material. You only need one or two drops of superglue. The more you use, the more sanding you’ll have to do later, so if you’re not planning to refinish the back of the neck, it’s best to keep it minimal. I also recommend putting a drop on a paper towel first to see how runny it is (no, I definitely didn’t learn that the hard way).
Superglue dries quickly, but you still have a little working time. After placing the new material into each hole, give it a few seconds to start curing before cutting it. If it shifts slightly, it’s fine to hold it in place for a minute. Cut each piece close to the surface, but not perfectly flush with the fretboard. The closer you get, the less sanding you’ll need, but since you’ll be sanding a bit of glue too, it helps to leave a little extra height.
Once they’re all installed, give them a minute to finish curing. Take a second to step back and admire how great it’s already looking. Then it’s time for the slowest part of the process: sanding.
Go slowly here. I start with 600 grit and sand three to four dots at a time using the sanding block. I stop often to make sure I’m making contact with all of them. If one sits a little lower than the others, I’ll switch briefly to 400 grit, then move back to 600 as I get closer to flush with the edge of the fretboard. Once they’re all very close, I finish with 1000 grit and then 1200 grit to smooth everything out.
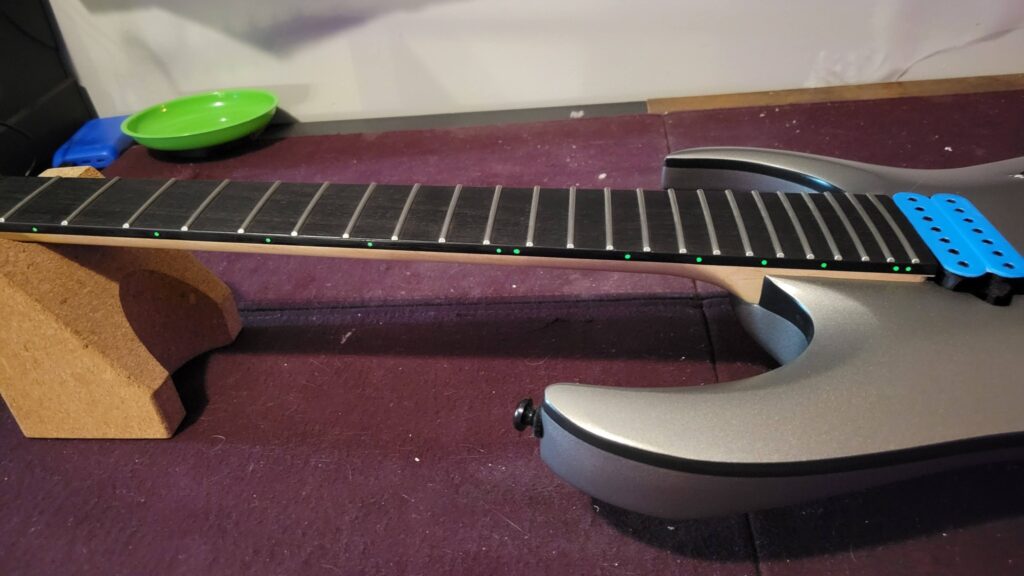
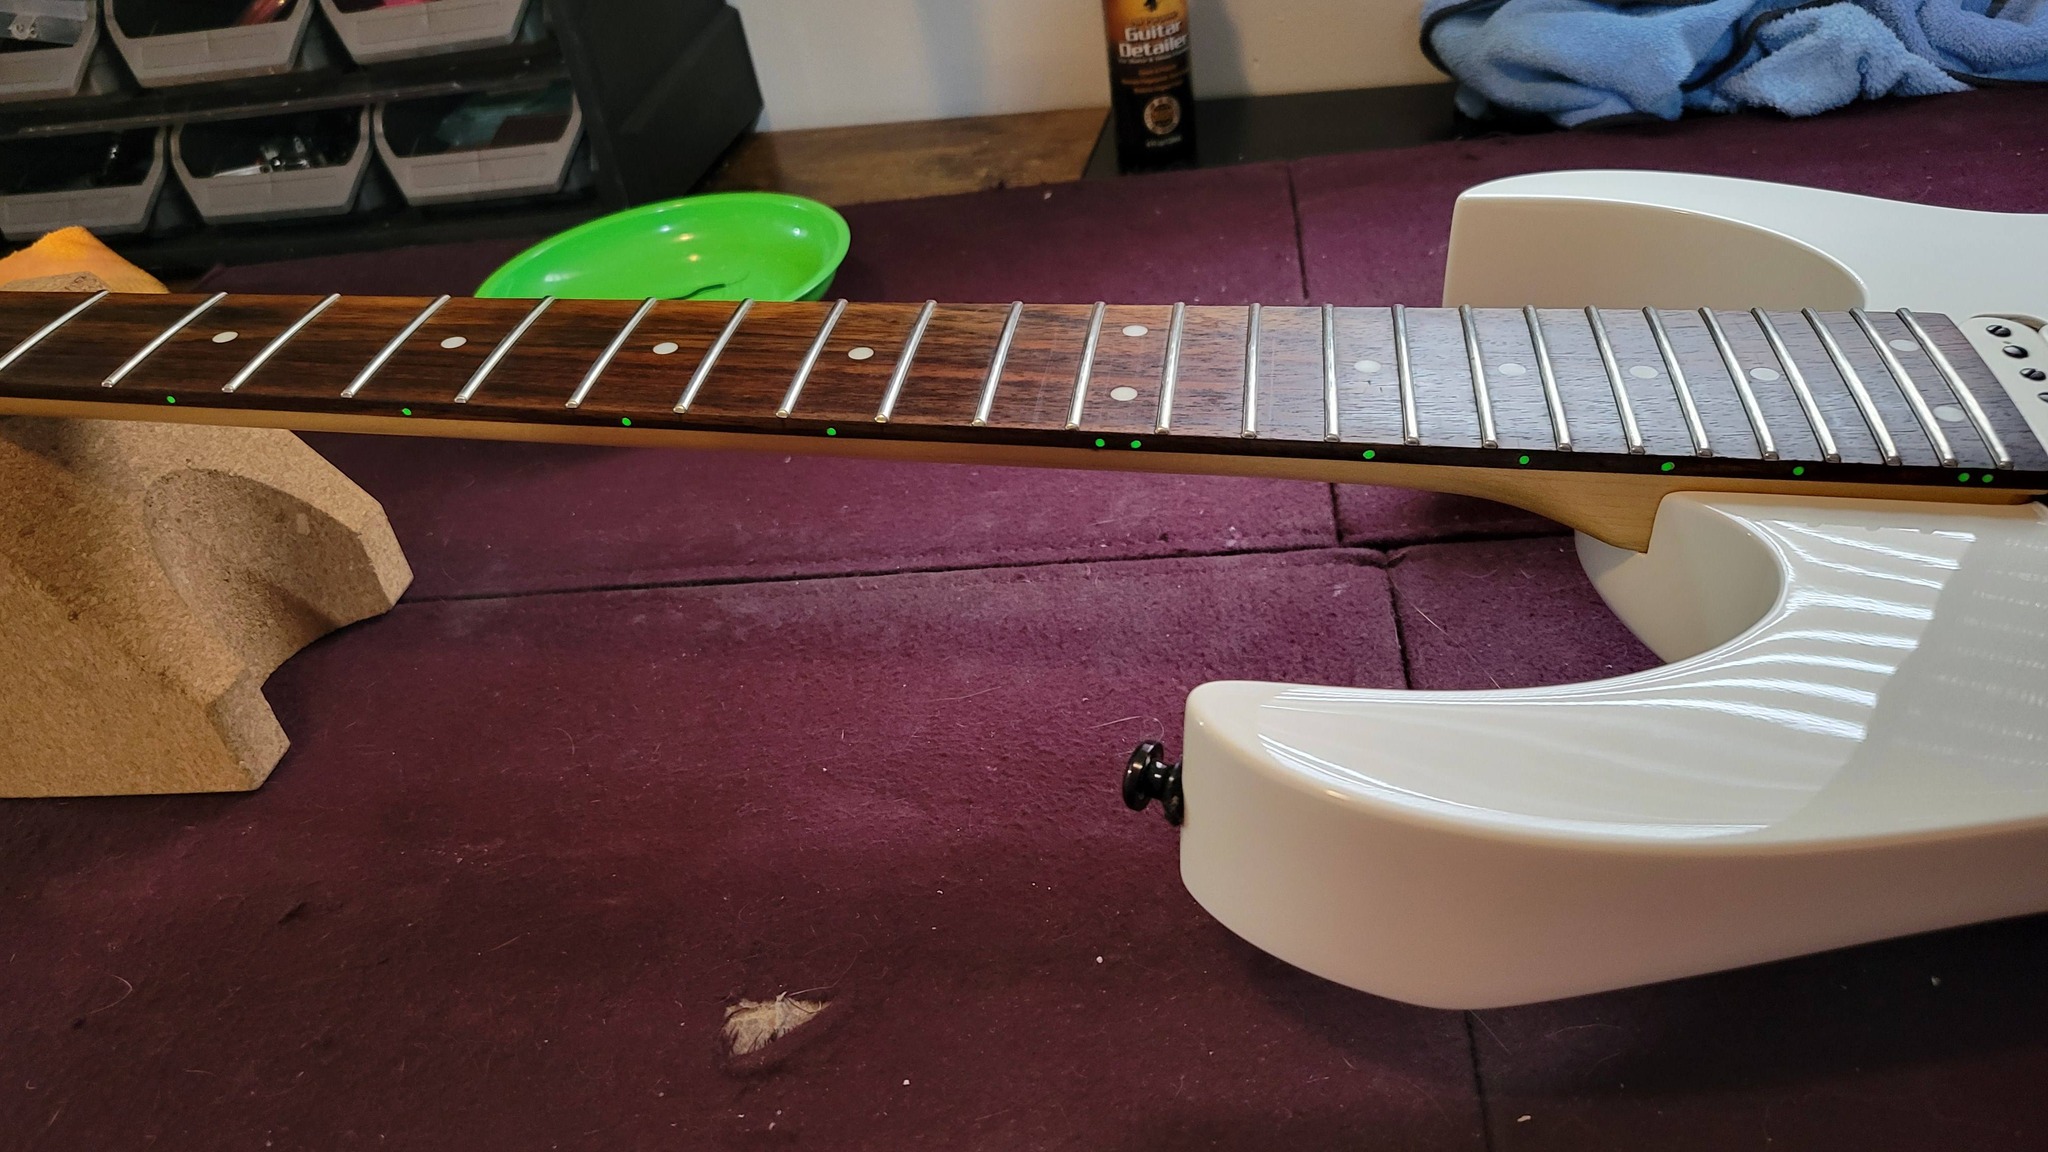
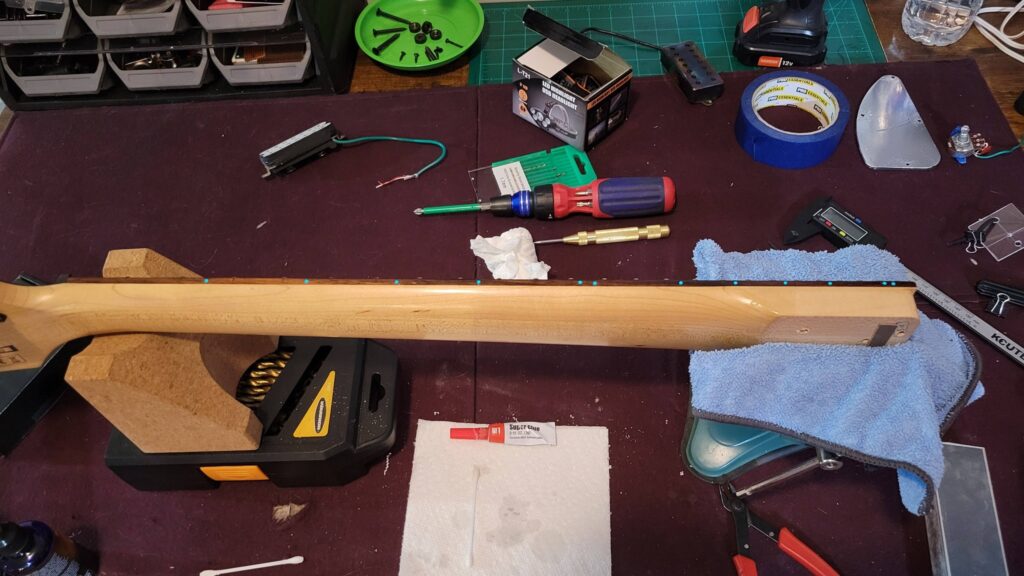
Almost ready for reassembly! Start by cleaning off any remaining dust from the fretboard edges and the rest of the fretboard. Then rub on some lemon oil or your preferred fretboard conditioner. I like Music Nomad F1 oil, but anything similar will work. This will make the edges of your fretboard look like new, and you’ll end up with side dots that look fantastic, are much easier to see, and appear like they were installed at the factory.
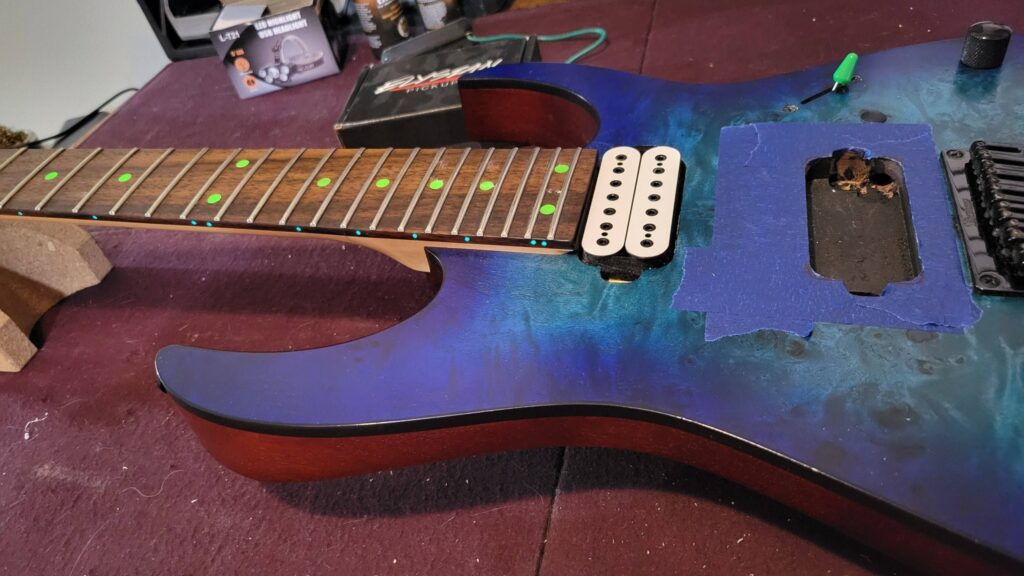
Here’s the three that I have done so far. I suspect I will do this to all of my electric guitars going forward.