
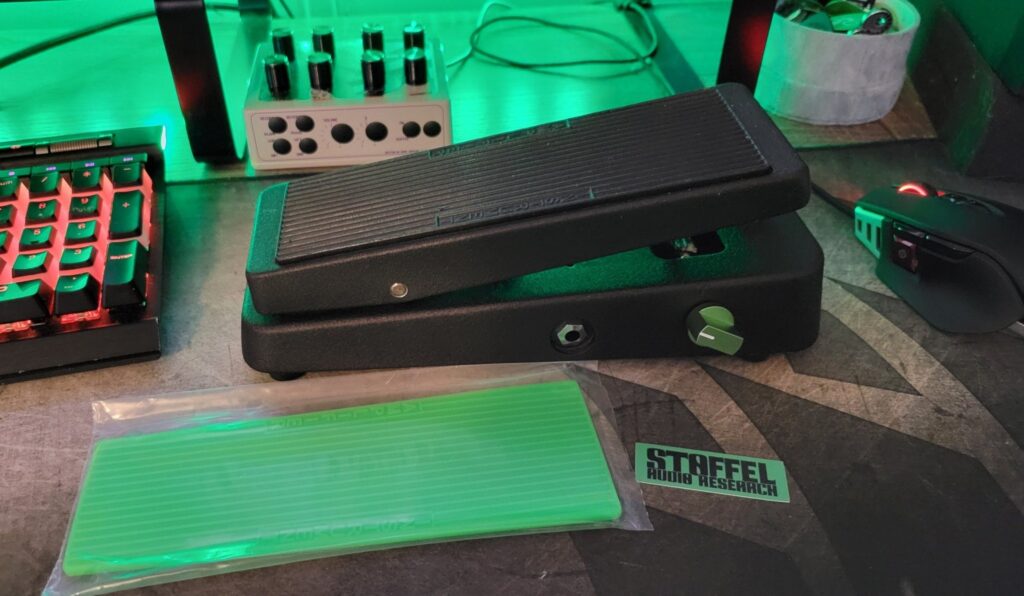
Wah enclosures are surprisingly hard to find these days, so much that it’s usually easier to modify an existing wah or reuse an enclosure from a dead one. What most people do not realize is that many Crybaby variants are only one or two components away from sounding far better than stock. For instance, I took this standard GCB 95 and turned it into a Jerry Cantrell wah. Aside from adding the sensitivity potentiometer on the side of the enclosure, it is literally a single capacitor change to get the Cantrell voicing. C5 controls the sweep of the wah, and swapping it alone makes a huge difference in how it sounds.
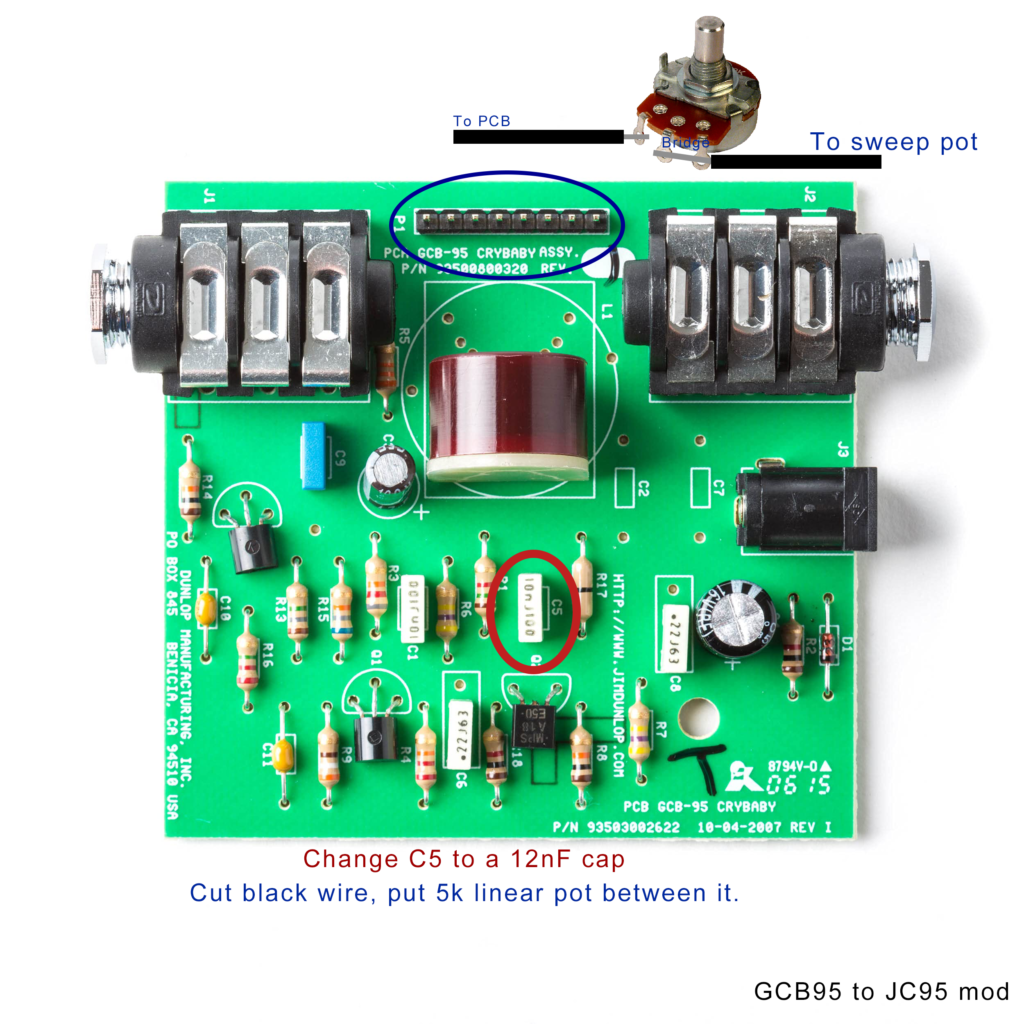
Excuse the crude illustration, but if you look at the PCB in your Crybaby it should be obvious what’s what. You can go deeper by swapping inductors or converting it to true bypass, but I’ve seen Cantrell wahs with both the red Fasel inductor and the black Dunlop inductor, so it’s not critical. The real change is the capacitor swap. C5 controls the sweep of the wah, and this one component makes a huge difference in how it sounds. You could stop here and already have a killer wah, but adding the sensitivity pot is easy too. Just cut the black wire in the ribbon cable and wire the pot in between like shown. I mounted mine on the right side of the enclosure when looking down at the treadle. If you want it on the left, just reverse the wiring. As for drilling the enclosure, you don’t need anything fancy. A drillpress is nice, but the enclosure isn’t square so a hand drill works just fine. You’ll want to drill a pilot hole then use a unibit to step it up until it’s the correct size. If you’re unsure of what size, take calipers to the pot shaft and then find which step on the unibit is closest.
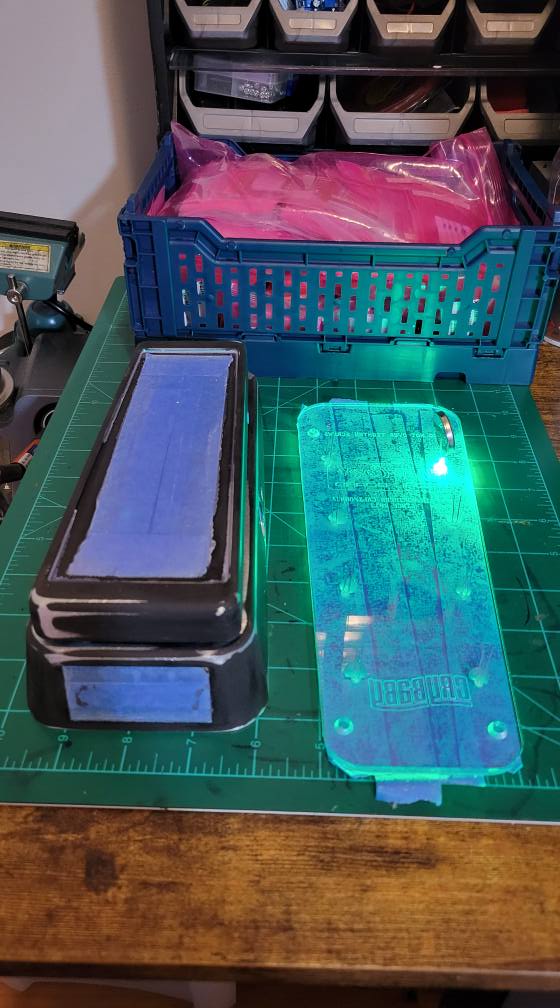
I couldn’t just stop there, I wanted this pedal to look as killer as it sounded. I had made a light plate before and that was a pain without the right tools, so this time I bought a clear bottom plate and added the LEDs directly. I used 3mm flat top LEDs from LighthouseLEDs. You really need to embed them into the acrylic for them to glow properly, so the flat tops worked perfectly. I just used hot glue to secure them, but it would probably look much nicer to use superglue instead.
If you are lucky enough to get a newer GCB 95, it probably already has the correct footswitch you will need to add indicator LEDs. The older models used 3 lug SPDT switches, while the newer ones use 6 lug DPDT switches that Dunlop bridge to act like SPDT. Remove that bridge and you can add as many LEDs as you want…I sure did!
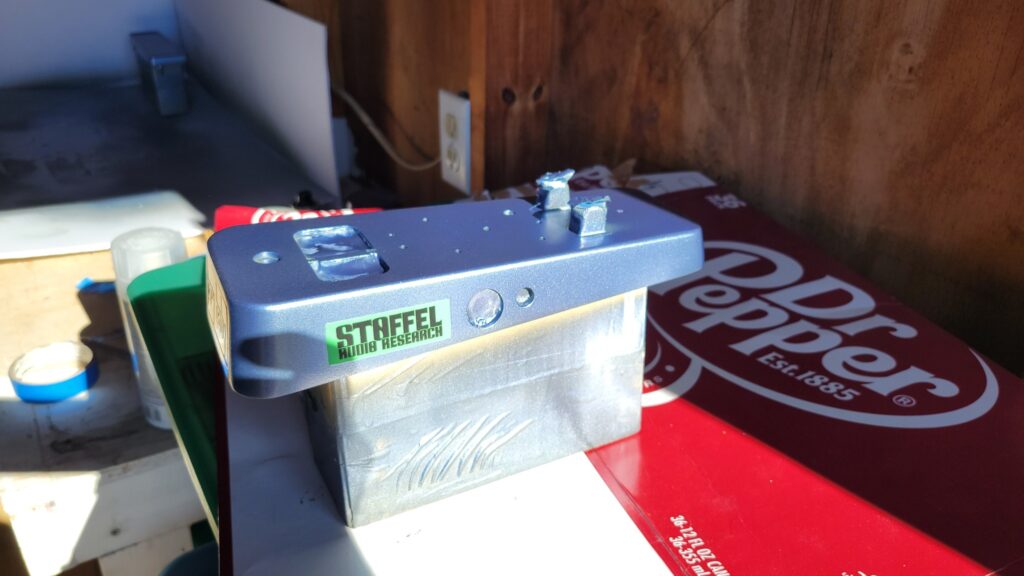
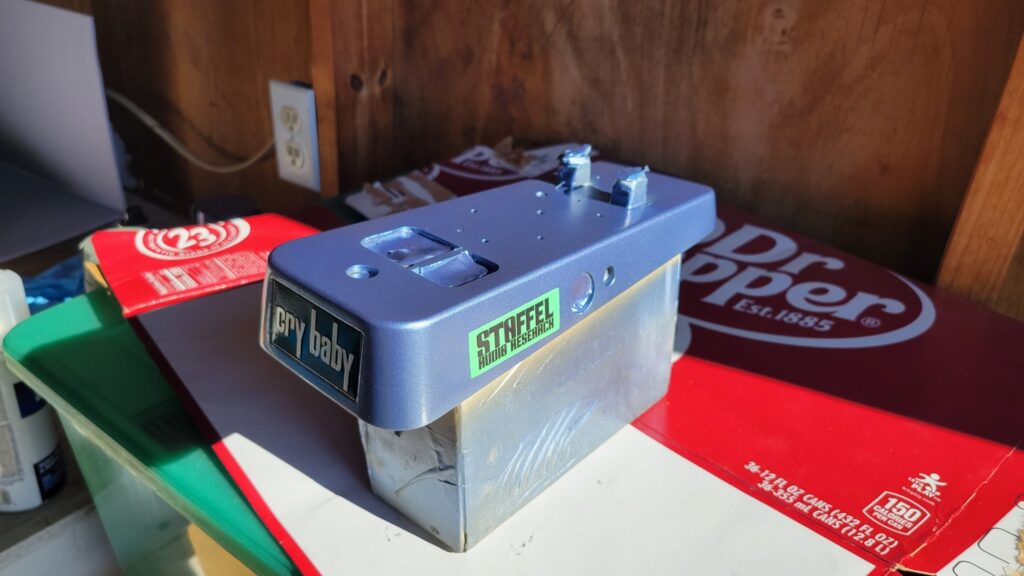
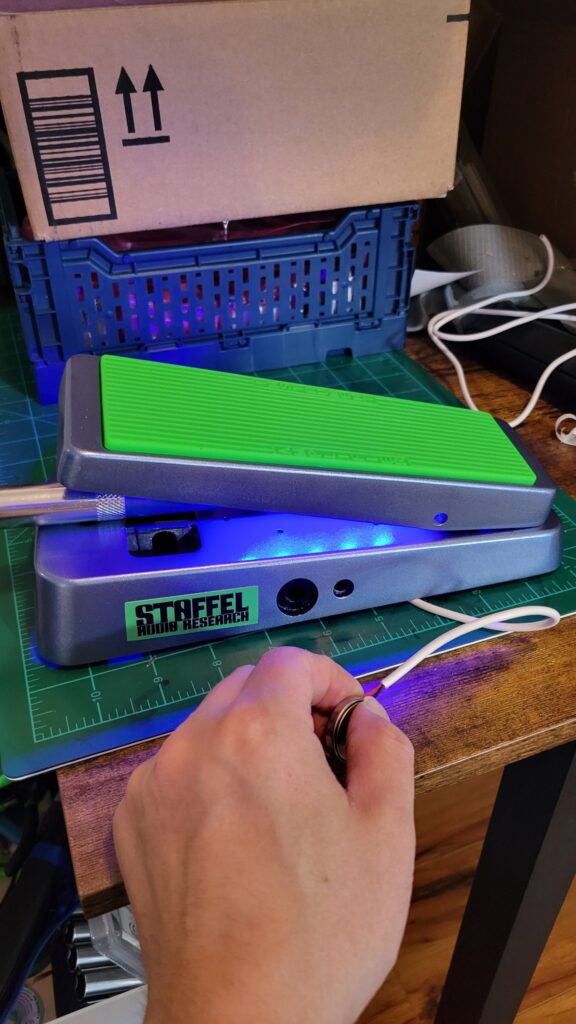
I also added some LEDs under the treadle. These are just a 5v 5050 SMD style strip with adhesive backing. The adhesive on these can be suspect so I used some 3M automotive double sided tape for good measure. I drilled a single hole down into the enclosure before painting (while I had the treadle off) to run the wire. It is a lot of LEDs, but someone has to make up for Dunlop’s lack of indicators. As for the paint, I used a self-etching primer, then Montana spray paint in metallic blue to refinish it, and some enamel clear over that. Can’t say enough great things about the Montana paints for this type of thing. They work great on pedals and are easy to work with.
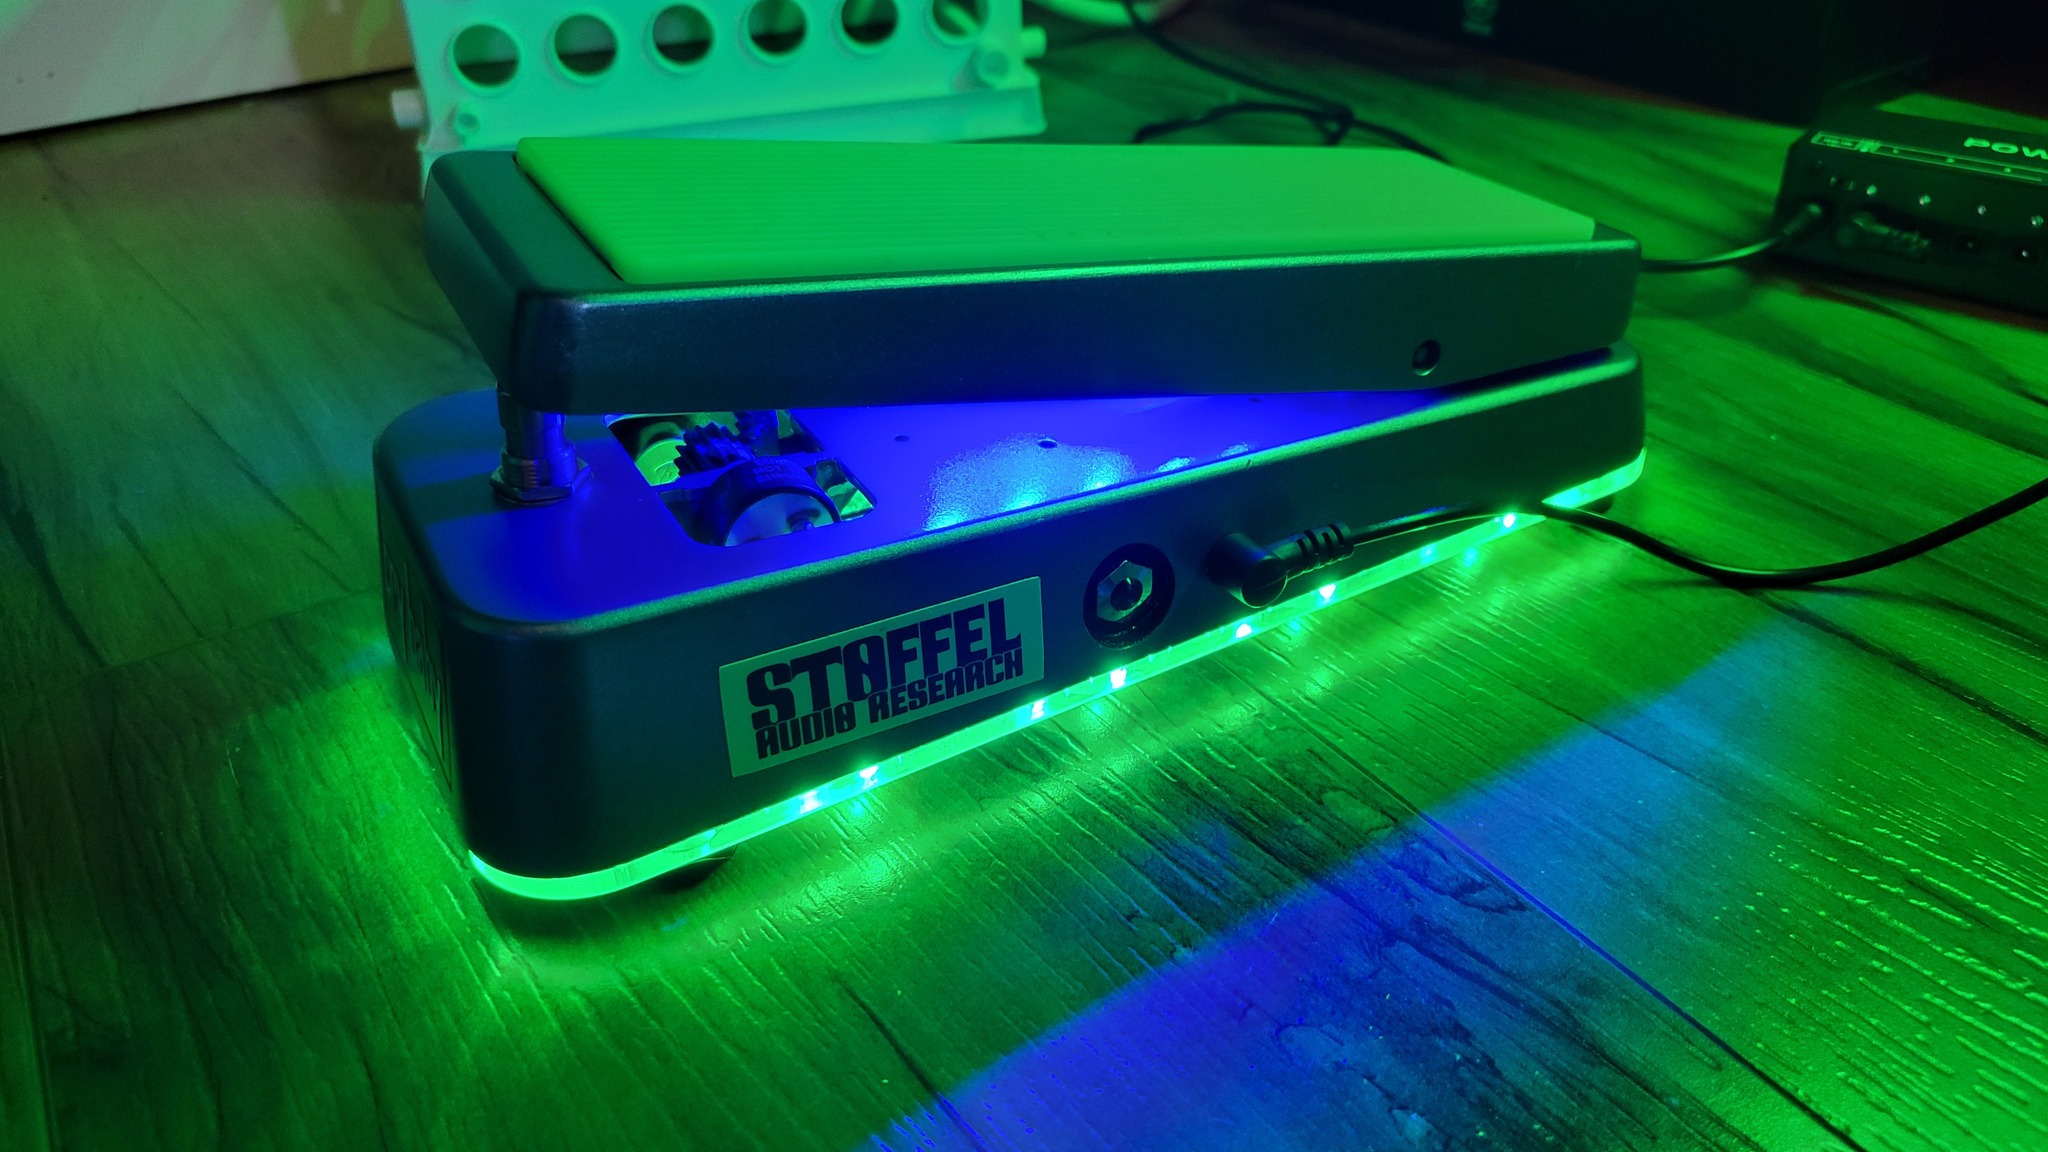
And here we have the finished product! This sick wah will get a ton of use, it looks like no other wah, and cost me a fraction of what a JC95 would, even with buying custom rubber tread and clear bottom plate.